Setting Up A New Violin
A Beginner's Guide to Set Up and Maintain the Violin
© Goh Tong Keat
Getting Your First Violin
Learning to play the violin can be one of the best decisions that you have made for yourself. Whether you choose to learn face-to-face from a qualified instructor or through the vast amount of online resources, you are bound to deal with this situation – buying a violin and setting it up for the first time. If you visit a brick and mortar music shop, you are likely to find an instrument that has been set-up appropriately. However, not every shop owner has the expertise to do it right, particularly when they do not specialize in the selling the violins. On the other hand, if you order a violin from eBay or Amazon, you have to set it up yourself.
Setting Up the Violin
Strings and Bridge
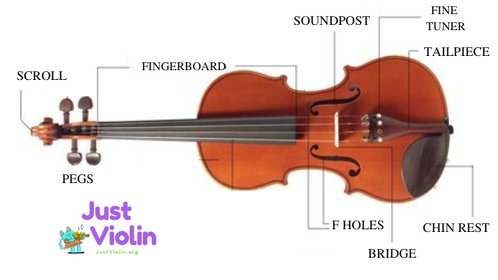
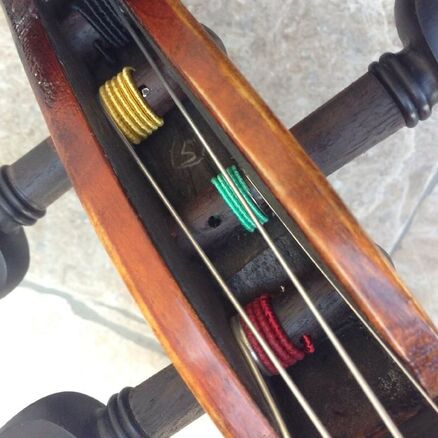
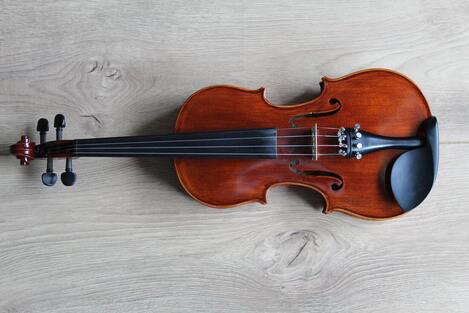
When you first receive your instrument from the store, the strings are usually not installed or intentionally loosened, and the bridge detached to keep the instrument safe for shipping. If the strings do not come installed, you need to sort out the strings by name (from left to right - G, D, A, E) and install them to the pegs and tailpiece. With the front of the violin facing you, the peg for G string is the one at the lower left, followed by upper left (D), upper right (A), and lower right (E). Install each string by inserting the ball end of the string to the tailpiece or fine tuners, and thread the other end through the peg holes and tighten it by rotating the peg towards the scroll. Make sure the strings are well-aligned without overlapping as you turn the pegs. They should be coiled outward towards your hand for each peg (refer to the picture below).
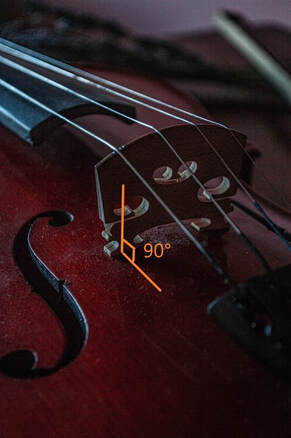
Leave the strings slightly loose so that you can install the bridge. Hold your bridge upright and identify the higher and the lower side. The higher side should be to the left (G string) and lower side to the right (E string). Since each violin is slightly different, professional luthiers tend to have different ideas on where exactly to place the bridge. But if you are a beginner, a useful reference would be to align the bridge directly centered with the inside wedge of the f-holes. Make sure the bridge is upright and centered between the f-holes, and you may proceed to tune each string to its desired pitch. As you tune the strings, make sure that the bridge remains upright and centered. At the same time, you need to keep the string on the groove of the bridge and the nut at the top of the fingerboard. You can prevent the pegs from slipping back as you tighten the strings by pushing it inwards into the pegbox as you tune.
Chin Rest and Shoulder Rest
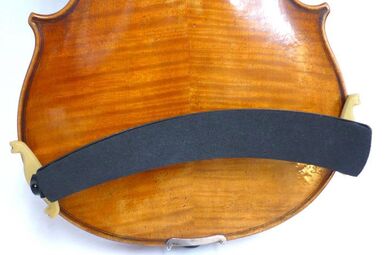
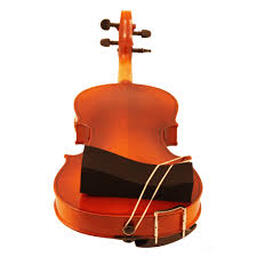
Chin rest often came installed on the violin, but if it does not fit your jaw shape, you may need to replace it with a different one. The shoulder rest, on the other hand, is a separate accessory that does not usually come with the violin. Violin teachers have differing views on whether one should use the shoulder rest or not. The purpose of the shoulder rest is to fill the gap between the back of the violin and the shoulder. Unless the players have a perfectly square shoulder, most people find having a shoulder rest helpful. (Refer to the pictures below to see the proper placement of a shoulder rest).
Setting Up the Bow
The hair on the bow can be tightened or loosened by the screw. When the screw is facing you, turning it clockwise tightens it and vice-versa. Usually, we loosen the hair when the bow is not in use. Keep in mind that whenever you are tightening the bow hair, do not overdo it. The bow should maintain its curve while the bow stick should not come into contact with the bow hair when you place it on the strings.
The hair for a new bow has no friction to it, and hence, it does not make any sound when you draw it across the strings. You need to apply rosin to the bow hair. There should be a piece of rosin that comes with your violin. Otherwise, you need to purchase one. Rub the rosin across the bow hair evenly until the transparent surface of the rosin becomes slightly opaque, and you can see some powdery substance coming off the rosin. Try it on the violin again to see if it makes a sound. Keep in mind that you should avoid touching the bow hair at any time to keep it clean.
The hair for a new bow has no friction to it, and hence, it does not make any sound when you draw it across the strings. You need to apply rosin to the bow hair. There should be a piece of rosin that comes with your violin. Otherwise, you need to purchase one. Rub the rosin across the bow hair evenly until the transparent surface of the rosin becomes slightly opaque, and you can see some powdery substance coming off the rosin. Try it on the violin again to see if it makes a sound. Keep in mind that you should avoid touching the bow hair at any time to keep it clean.
|
|
Taking Care of Your Violin
Storing and Carrying the Violin
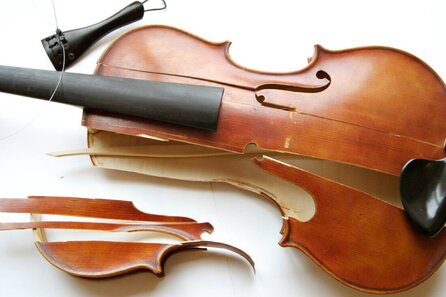
- Proper Temperature and Humidity: The violin is a fragile instrument made of multiple wooden parts glued together. It is very sensitive to changes in temperature and humidity. When storing the violin, avoid keeping it under extreme temperature. Never leave it exposed outdoors in the winter or under the hot sun. If the temperature is too cold/hot for you, it is the same for your instrument. If you live in a place where the humidity level is low, consider getting a humidifier for your instrument.
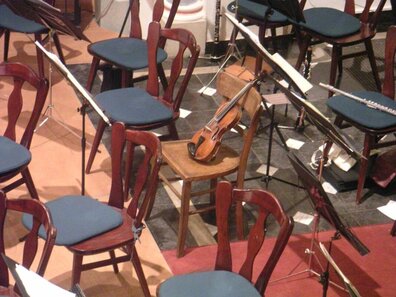
- The Violin Case: Keep the violin in the violin case when it is not in use. Make sure that the case is properly closed or zipped before you carry the case. Avoid leaving the violin at vulnerable places where someone may accidentally damage it. Invest in a good violin case that offers sturdy protection. The cheaper violin cases in the market are made of foam and they do not offer good protection for your instrument. The better cases are made of wood or synthetic material such as carbon fiber.
- Traveling with Your Instrument: If you are traveling by air, make sure to hand-carry your violin with you and store it in the overhead baggage compartment. It is extremely risky to check-in your violin with other baggage. If you are traveling by bus or train, it is also advisable for you to carry it with you to your seat.
Check the Set-Up Regularly
- The Pegs: When tuning the strings, make sure that the pegs can turn smoothly. If they are too tight or slip off easily, it means that they do not fit the peg holes well enough. You can bring it to a luthier to have a set of new pegs properly fitted. If it is not too serious, consider getting some peg compounds that you can apply to the pegs. There are different compounds available in the market for pegs that are too tight or too slippery.
- The Bridge: Check the bridge regularly to make sure that it is upright. As we tune the strings with the pegs, the strings pull the bridge towards the fingerboard. If left unchecked, the bridge may warp, or has one side of the feet coming off from the top of the violin. It is, therefore, essential to re-adjust the bridge from time to time. Get someone with experience to do it if you do not know how to do it.
- The Chin Rest: The chin rest may get loose and move away from its original position. It will affect the sound if it comes into contact with the tailpiece. Use an appropriate tool to unscrew the chin rest, set it back into position, and tighten it. Make sure there are enough cork under the chin rest and the metal clamp to protect the surface of the violin.
Keep the Violin in Good Condition
- Protect the Varnish: The grease and sweat from the hands may erode the varnish on the violin. Therefore, it is important to wash your hands before playing the violin. Avoid holding the body of the violin (i.e., the varnished parts) with sweaty palms. Use only appropriate commercial cleaner or polish to clean your instrument. Do not use water or any other substance that may damage the violin.
- Keeping the Violin Clean: After each playing session, remember to wipe off the rosin dust on your violin and bow stick with a dry and soft cloth. Rosin dust left on the violin for too long will become very hard to be removed.
- Maintain the Bow: The bow needs to be loosened when not in use. If you keep the bow hair tightened over a long time, the bow stick will slowly lose its camber. It will also reduce the life span of the bow hair. Avoid tightening the bow too much when playing. The bow stick should remain concave at all times. Also, remember to keep the bow hair clean by not touching it with your hands and fingers.
Promotion: $2.99 only
|
How to Change Violin String
|

