The Joachim Method of Violin Playing
© Goh Tong Keat
|
|
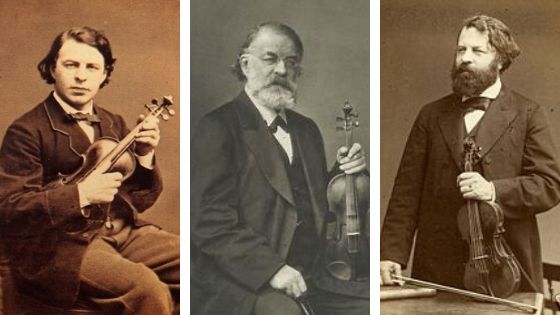
Joseph Joachim was a famous violinist of the 19th century. As a composer, his works may not be as recognizable as those of his contemporaries. However, he was the dedicatee of multiple important violin compositions, including Brahms, Bruch, and Dvořák's violin concertos. Apart from that, as the teacher of many notable violinists, his method of violin playing is a valuable resource that we should study.
Based on the publication of Karl Courvoisier, a student of Joachim, "The Technique of Violin Playing" presents a set of comprehensive violin instructions as pursued by Joachim himself. Violin pedagogy has changed tremendously since the 19th century. While some of the advice presented here may be outdated or no longer relevant, there is still a great deal of information that we can learn from.
Based on the publication of Karl Courvoisier, a student of Joachim, "The Technique of Violin Playing" presents a set of comprehensive violin instructions as pursued by Joachim himself. Violin pedagogy has changed tremendously since the 19th century. While some of the advice presented here may be outdated or no longer relevant, there is still a great deal of information that we can learn from.
 look inside
|
The Technique of Violin Playing - The Joachim Method Reference Textbooks; Technique Musicianship; Textbook - Instrumental. Dover Edition. Instructional and Method. Instructional book. 51 pages. Dover Publications #06-452743. Published by Dover Publications (AP.6-452743). |
Left Side: Tone Formation
The first part of the book discussed the violin-playing posture and the left hand. While these instructions came from a time when the chin rest was not widely used yet, it highlighted three critical points for holding the violin:
For the left hand, each fingertip must come in contact with the string perpendicularly. To allow that to happen, the position of the base joint of the first finger is extremely important. A simple rule quoted from the book says: "Place the tip of the forefinger perpendicularly upon the proper place on the string, and draw the base of the finger as near it as possible."
The section on the positions and actions of the fingers are very helpful. The fingers should be trained to develop strength and independence by lifting high and dropping them on the string with an "audible blow upon the fingerboard." The fingers should then stay on the string until it is necessary to be lifted. There are further instructions on how we should prepare the fingers in different passages and change of positions.
The section on intonation touched on two points. The first is that beginners tend to treat whole steps, half steps, and the intervals too lightly. The chromatic change of an interval by the finger position on the string is usually greater than the interval of a semitone in the diatonic scale. The second point talked about the resultant "third tone" from playing double stops on consonant intervals. Violinists should get used to listening out for the third tone for better intonation.
- The strings must run horizontally from the bridge to the nut (i.e., parallel to the floor) to avoid the bow from slipping off its contact point.
- The violin should not be held "straight out" (i.e., directly in front of the body) nor too far to the left.
- The right side of the violin should be tilted lower at about forty-five degrees.
For the left hand, each fingertip must come in contact with the string perpendicularly. To allow that to happen, the position of the base joint of the first finger is extremely important. A simple rule quoted from the book says: "Place the tip of the forefinger perpendicularly upon the proper place on the string, and draw the base of the finger as near it as possible."
The section on the positions and actions of the fingers are very helpful. The fingers should be trained to develop strength and independence by lifting high and dropping them on the string with an "audible blow upon the fingerboard." The fingers should then stay on the string until it is necessary to be lifted. There are further instructions on how we should prepare the fingers in different passages and change of positions.
The section on intonation touched on two points. The first is that beginners tend to treat whole steps, half steps, and the intervals too lightly. The chromatic change of an interval by the finger position on the string is usually greater than the interval of a semitone in the diatonic scale. The second point talked about the resultant "third tone" from playing double stops on consonant intervals. Violinists should get used to listening out for the third tone for better intonation.
Right Side: Tone Production
The second part of the book discussed the bow and tone production. No violin method would be complete without the instructions on how to hold the bow. However, Joachim's method of bow hold is no longer applicable to modern-day violinists. He recommended for thumb to be placed inside the frog, and if the gap is too narrow, remove the corners as much as necessary. Then, the nail of the thumb should rest against the metal ferrule.
Regardless of that, it was highlighted that the bow hold needs to feel secure without excessive pressure from the fingers. The position and functions of each finger were discussed in detail. The wrist, according to the book, is essential in facilitating string crossing. Hence, the hand needs to remain as horizontal as possible for the wrist to work. If the contact point of the first finger is too deep or too close to the base joint, it will change the angle of the hand and disrupt the function of the wrist.
For tone production, it is important to keep the bow playing at the right angle with the strings without changing the bow hold. Therefore, the upper arm, forearm, and wrist each has a role to play in maintaining the angle. It was suggested that if the bow was too long for a player that the wrist bends downward excessively at the tip, it is better to stop the bow stroke short and avoid using the very last part of the bow.
The book also mentioned that violinists should play with the edge of the hair because playing with flat hair causes dry and hard sound. Once again, this is debatable as some schools encourage the use of flat hair for more resistance and better tone production. Other sections of this part covered bow division, variations on dynamics, and various types of bowing technique.
*Download Joachim's "Violin School" for free HERE.